Image & Video Background Removal using Deep Learning

Eating JavaScript for breakfast. Building cool things on the web. Occasionally Blogging. Software Engineering | Product Management.
"Ever tried. Ever failed. No matter. Try again. Fail again. Fail better"
UPDATE:
I made a web application for Image and Video Background Removal using Anvil. Preview below.
Code and Explanation in the next section.
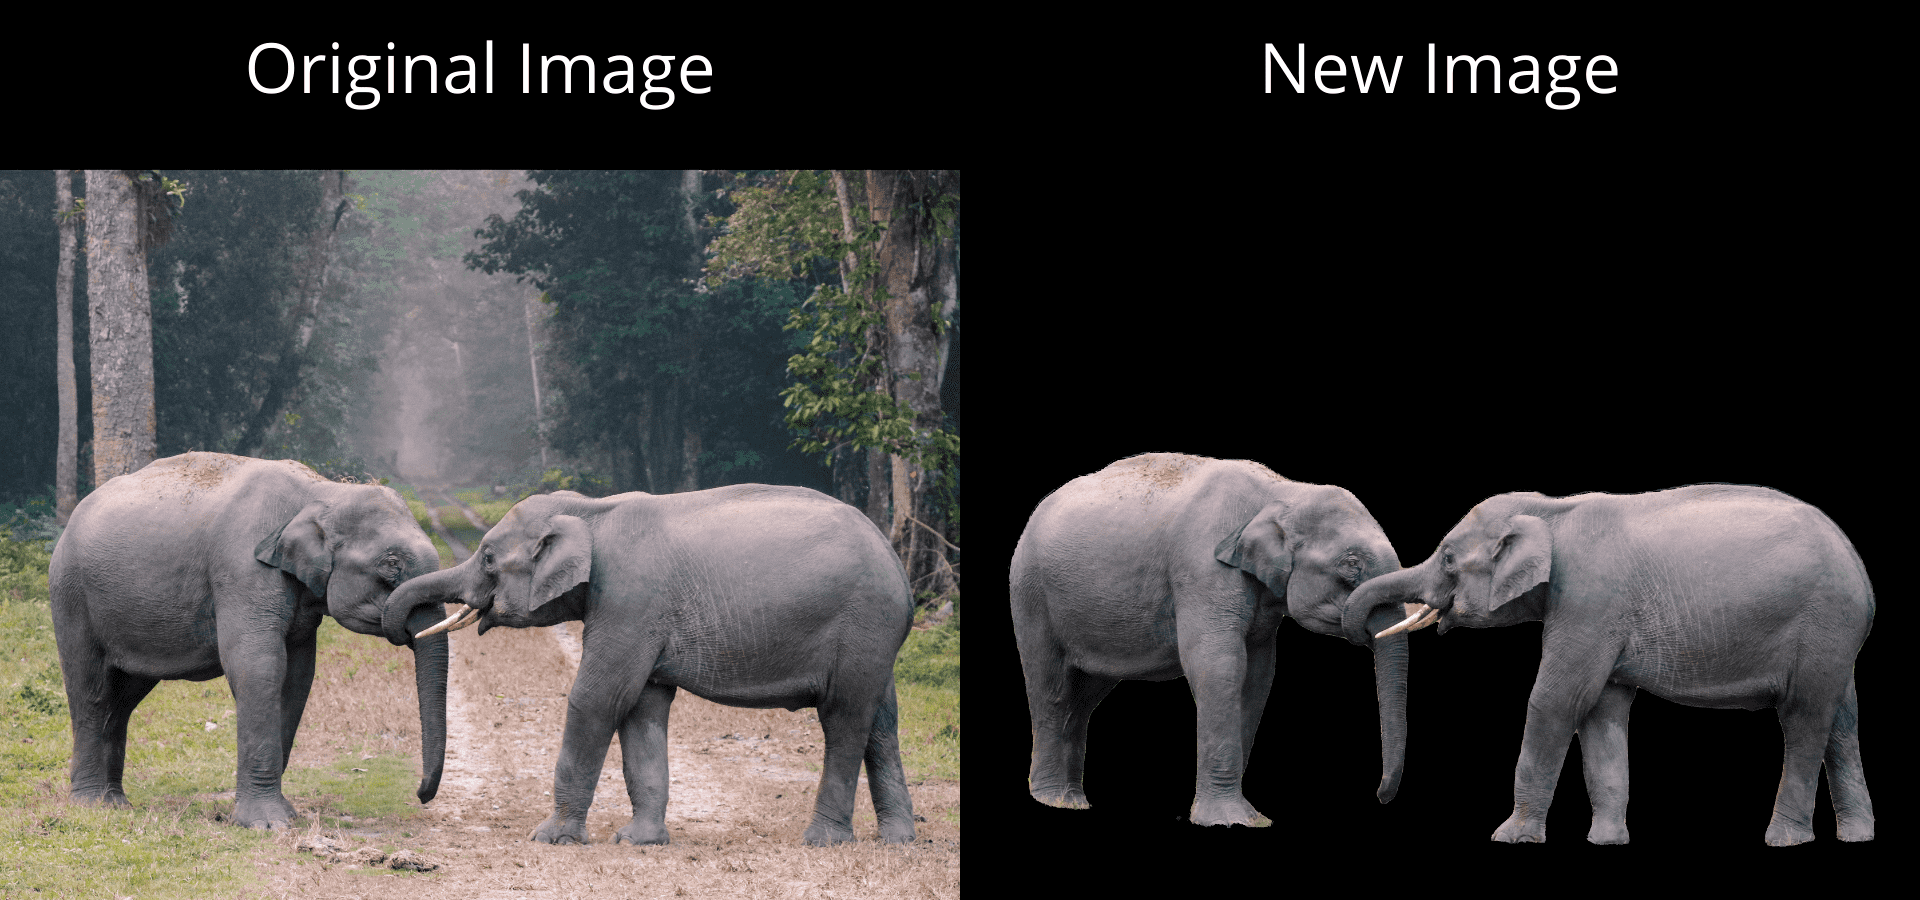
Background Removal is a process of separating the main object/image from its background.
Deep learning is part of a broader family of machine learning methods based on artificial neural networks with representation learning (Source: Wikipedia)
U-2-Net is a deep network model for Salient Object Detection (Github Repository: U-2-Net)
I have used the U-2-Net model along with OpenCV and Pillow library for Image and Video Background Removal.
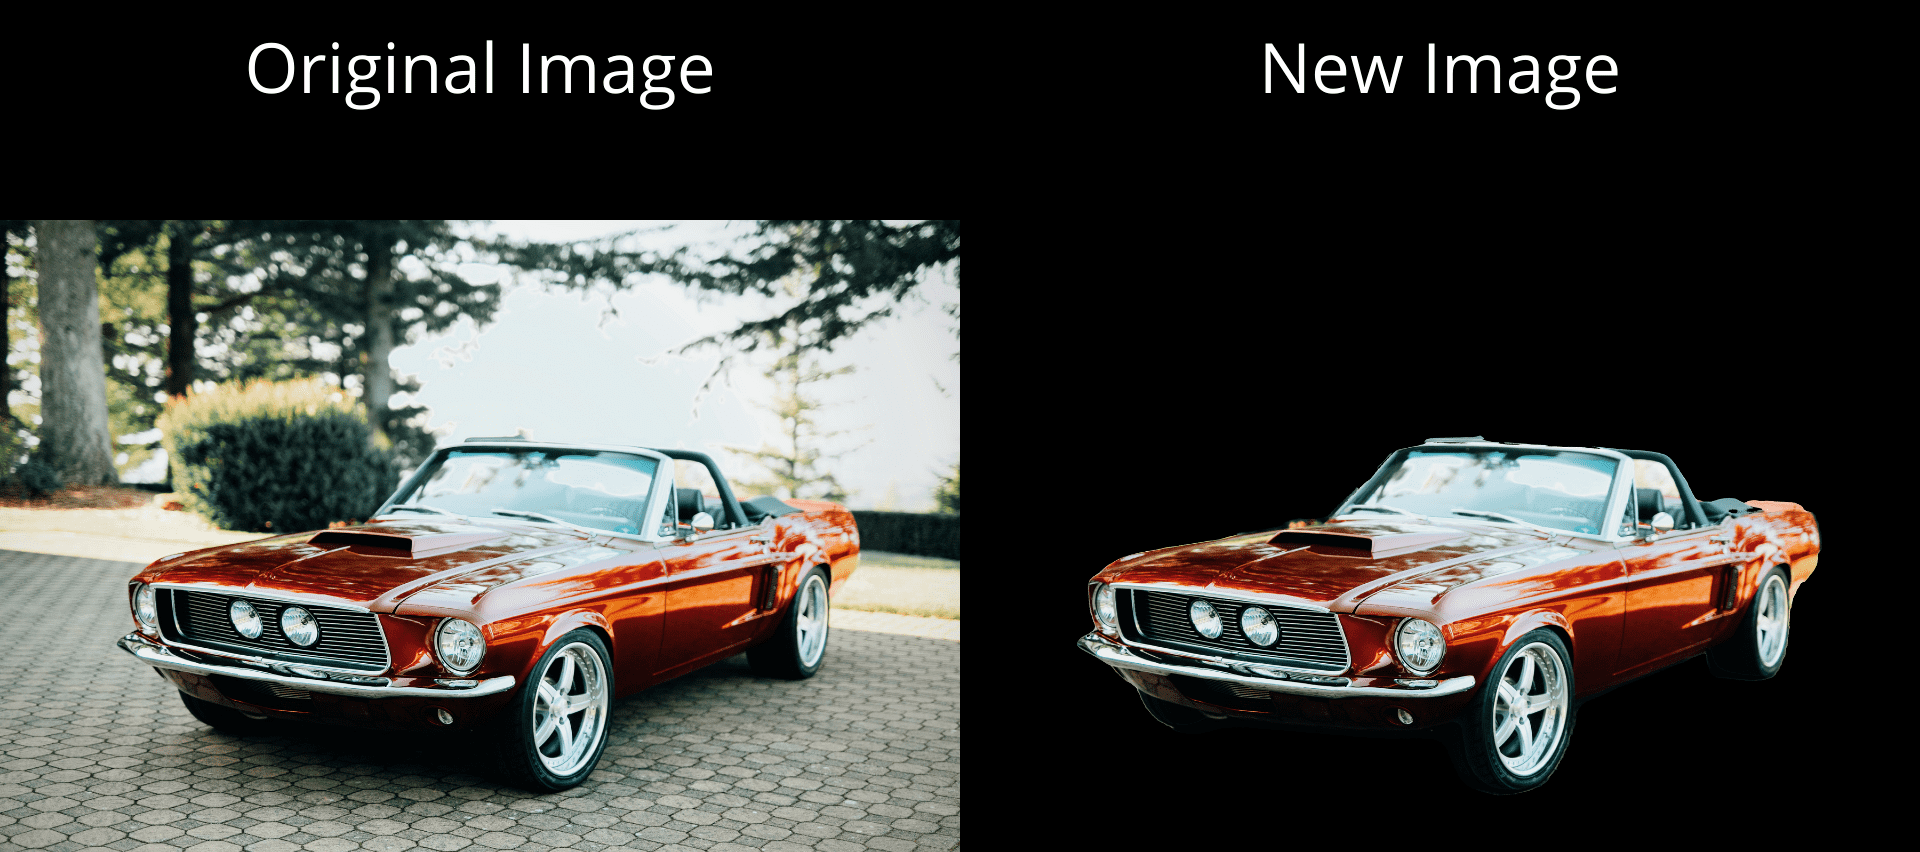
IMAGE RESULTS
VIDEO RESULT
The next section explains the code and how to use that code for background removal.
I will be running the code on Google Colab.
Colab is a free Jupyter NoteBook environment hosted by Google that runs on the cloud. Google Colab provides free access to GPUs (Graphical Processing Units) and TPUs (Tensor Processing Units).
Link to Github Repository and Jupyter Notebook are available in the next section. You can use the repository and notebook to remove the background for any Image and Video!
Download Jupyter Notebook containing all code from here.
Github Repository containing required files.
STEP 1 - Select the Hardware Accelerator
On Colab, go to Runtime→Change Runtime Type and select Hardware accelerator as GPU.
STEP 2 - Mount Google Drive
from google.colab import drive
drive.mount('/content/gdrive')
You will be given a URL and you will be asked to enter an authentication code to mount your google drive.
NOTE:
Sessions on Google Colab are 12 hours long. After 12 hours everything on Colab storage is wiped out (Notebooks will also disconnect from Virtual Machines if they are left idle for too long). So, it is advisable to use Google Drive for storage rather than using Colab’s storage.
STEP 3 - Download the Model and Required Files
%cd '/content/gdrive/MyDrive'
!git clone https://github.com/Nkap23/background_removal_DL.git
cd into your drive and clone the Github Repository.
Next, download the u2net model from here.
Now, go to your Google Drive, you should have a new folder named background_removal_DL.
Go to background_removal_DL/saved_models/u2net, delete the temp.txt file and upload the downloaded model(u2net.pth).
STEP 4 - Import Required Libraries and Functions
from cv2 import cv2
from PIL import Image
STEP 5 - Uploading Image/Video for Background Removal
- Upload image in the folder background_removal_DL/test_data/images/input. Keep the file name of the uploaded image as input.extension. (The code is written for .jpg files, but you can use it for any image format with a slight change in the code. More details about this in STEP 6A)
- Upload video in the folder background_removal_DL/test_data/videos/input. Keep the file name of the uploaded video as input.extension. (The code is written for .mp4 files, but you can use it for any video format with a slight change in the code. More details about this in STEP 6B)
STEP 6A - Running the Interface for Images
ORIGINAL IMAGE

- Creating temporary folders for u2net_results
%cd '/content/gdrive/MyDrive/background_removal_DL/test_data/images'
!mkdir u2net_results
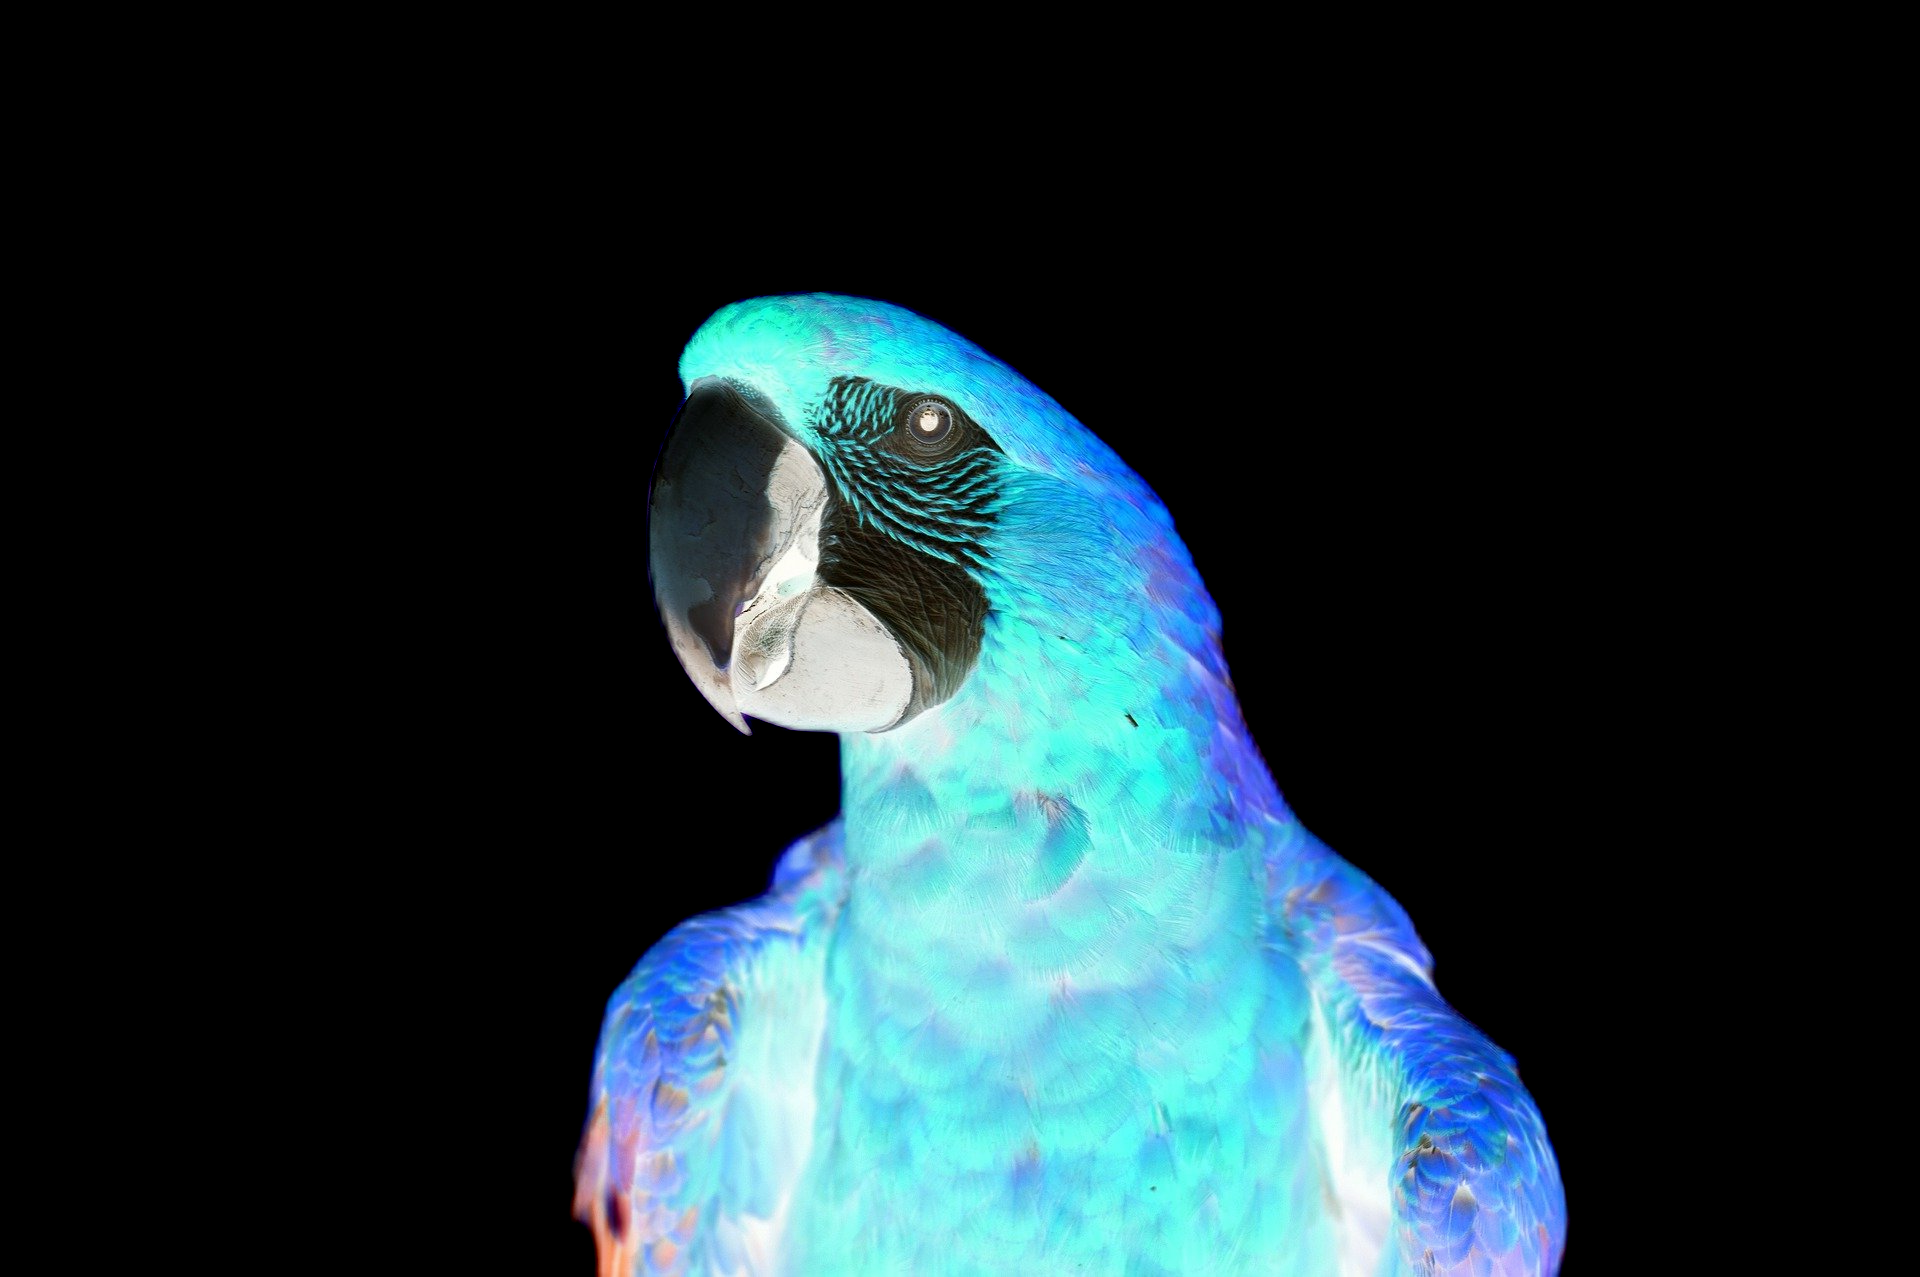
u2net is a salient object detection model. The below image shows the output of the u2net model on the image.
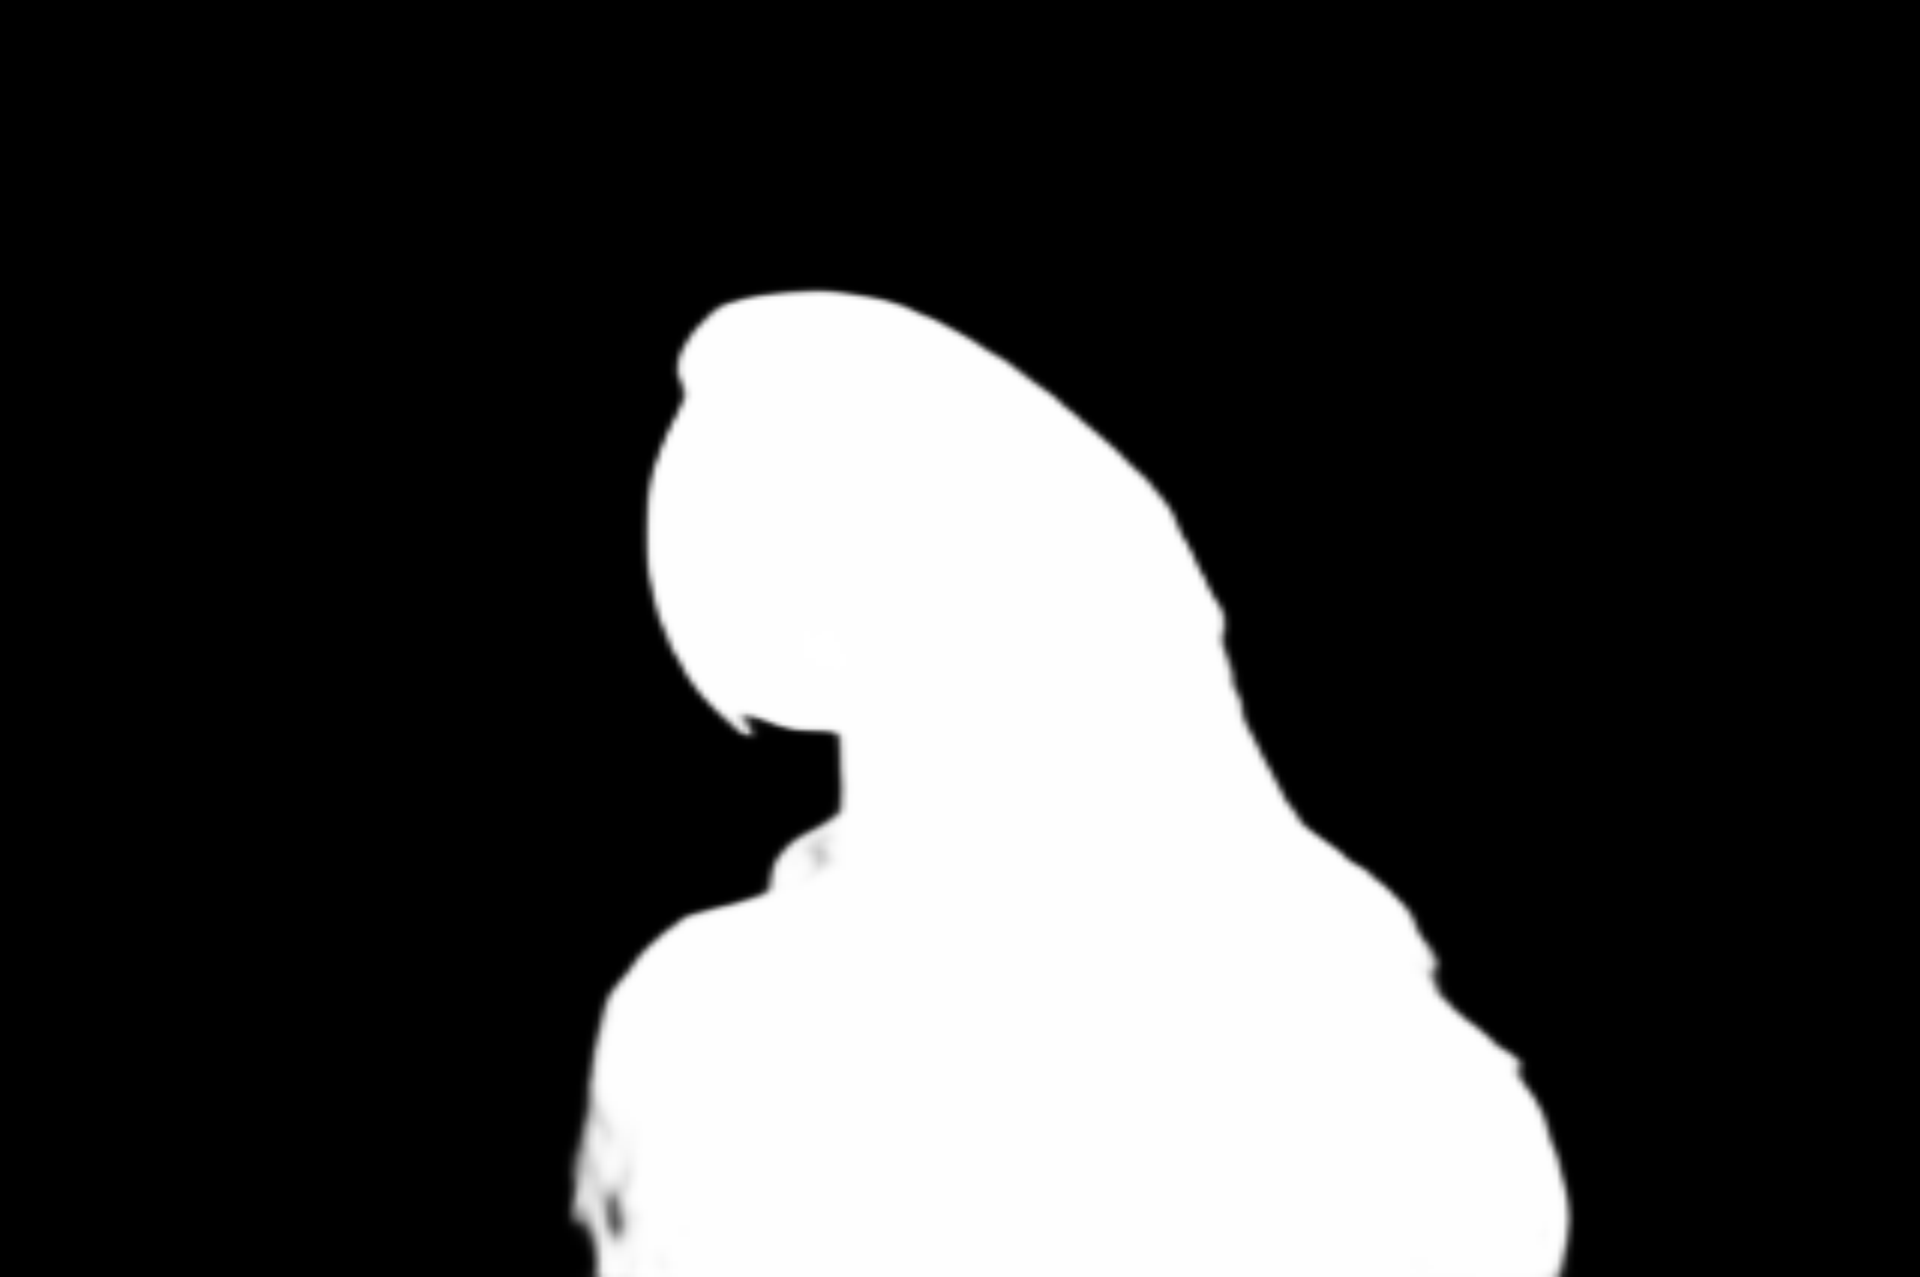
We are creating a temporary folder named u2net_results, where u2net's output will be stored.
- Running the salient object detection code on the input image
%cd '/content/gdrive/MyDrive/background_removal_DL'
!python u2net_image.py
The output of the above code(u2net output) will be stored in the u2net_results folder.
- Bitwise subtraction of the original image and u2net result
#u2netresult
u2netresult=cv2.imread('/content/gdrive/MyDrive/background_removal_DL/test_data/images/u2net_results/input.png')
#orginalimage (CHANGE FILE EXTENSION HERE - BY DEFAULT: .jpg)
original=cv2.imread('/content/gdrive/MyDrive/background_removal_DL/test_data/images/input/input.jpg')
#subimage
subimage=cv2.subtract(u2netresult,original)
cv2.imwrite('/content/gdrive/MyDrive/background_removal_DL/test_data/images/output/output.png',subimage)
Bitwise subtraction of the original image and u2net result will convert the background to black color. Below is the output image after bitwise subtraction (let's call this image sub_image)
NOTE:
Set the file extension in the above step according to your input image file extension.
- Extracting the main object/image
#subimage
subimage=Image.open('/content/gdrive/MyDrive/background_removal_DL/test_data/images/output/output.png')
#originalimage
original=Image.open('/content/gdrive/MyDrive/background_removal_DL/test_data/images/input/input.jpg')

subimage=subimage.convert("RGBA")
original=original.convert("RGBA")

subdata=subimage.getdata()
ogdata=original.getdata()

newdata=[]
for i in range(subdata.size[0]*subdata.size[1]):
  if subdata[i][0]==0 and subdata[i][1]==0 and subdata[i][2]==0:
    newdata.append((255,255,255,0))
  else:
    newdata.append(ogdata[i])
subimage.putdata(newdata)
subimage.save('/content/gdrive/MyDrive/background_removal_DL/test_data/images/output/output.png',"PNG")
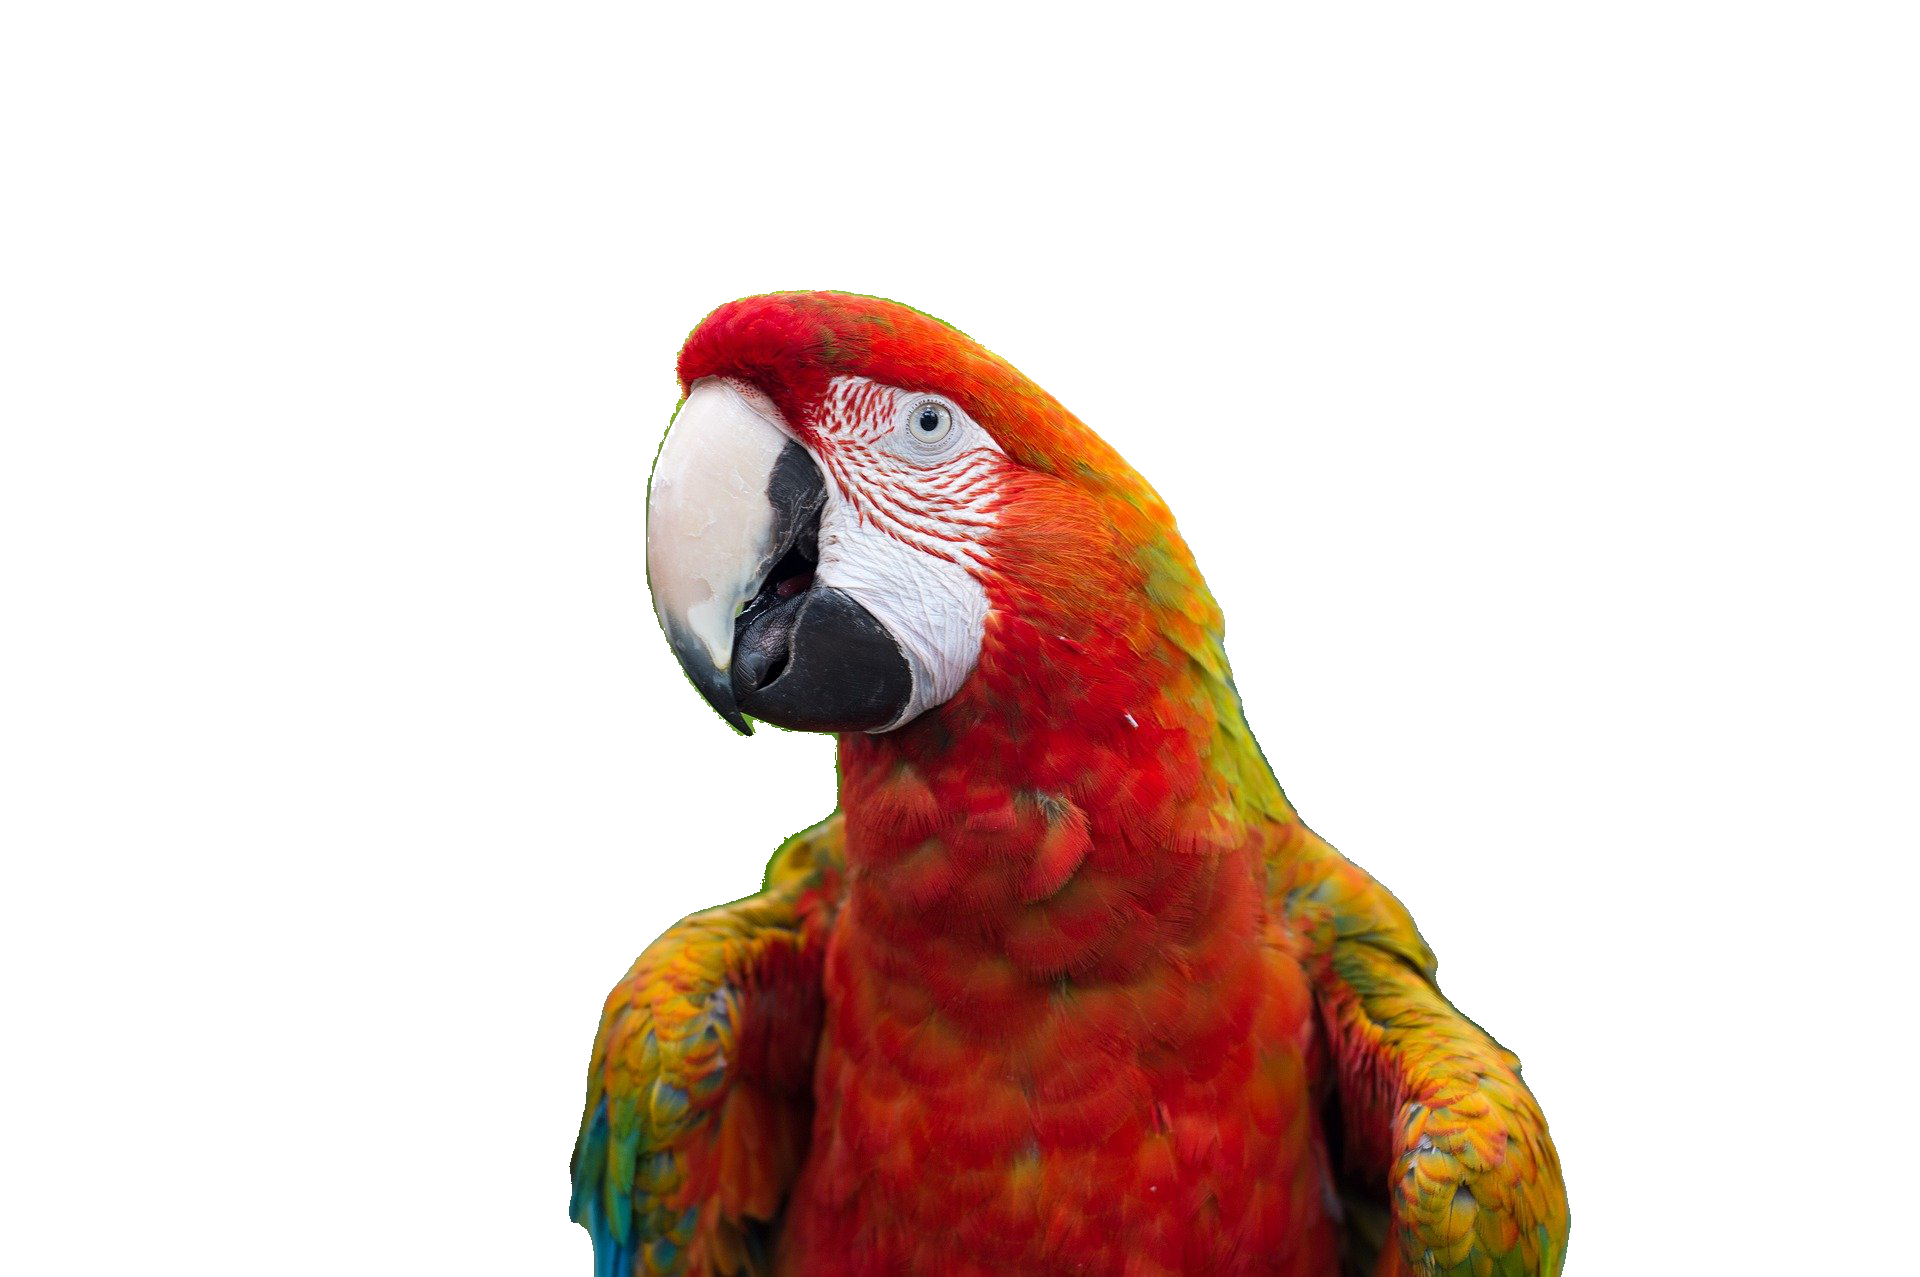
From sub_image, it is obvious that we need the non-black part of the original image. PIL library has been used to do so.
If the pixel of sub_image is black (0,0,0), we replace that pixel with a transparent pixel, and if the pixel is non-black, we replace it with the pixel (at the same location) from the original image.
FINAL IMAGE
- Deleting the temporary folder
%cd '/content/gdrive/MyDrive/background_removal_DL/test_data/images'
!rm -R u2net_results
The output image will be stored in the background_removal_DL/test_data/images/output folder.
STEP 6B - Running the Interface for Videos
The code for video background removal is similar to the code for image background removal.
Using OpenCV extract all frames from the video and then apply the salient object detection code on the frames.
Then use OpenCV to combine frames(without background) and make a video.
- Creating temporary folders for u2net_results, input_frames, and output_frames
%cd '/content/gdrive/MyDrive/background_removal_DL/test_data/videos'
!mkdir input_frames
!mkdir output_frames
!mkdir u2net_results
- Using OpenCV to extract all frames from the video
#CHANGE INPUT FILE EXTENSION HERE - BY DEFAULT: .mp4
video=cv2.VideoCapture('/content/gdrive/MyDrive/background_removal_DL/test_data/videos/input/input.mp4')
fps=video.get(cv2.CAP_PROP_FPS)
count=0
flag=1
while flag:
  flag,image=video.read()
  if flag==0:
    break
  cv2.imwrite('/content/gdrive/MyDrive/background_removal_DL/test_data/videos/input_frames/'+'input'+str(count)+'.png',image)
  count=count+1
NOTE:
Set the file extension in the above step according to your input video file extension.
- Running the salient object detection code on all frames
%cd '/content/gdrive/MyDrive/background_removal_DL'
!python u2net_video.py
- Removing the background from all frames and saving them
for i in range(count):

  #u2netreusult
  u2netresult=cv2.imread('/content/gdrive/MyDrive/background_removal_DL/test_data/videos/u2net_results/input'+str(i)+'.png')
  #original
  original=cv2.imread('/content/gdrive/MyDrive/background_removal_DL/test_data/videos/input_frames/input'+str(i)+'.png')
  #subimage
  subimage=cv2.subtract(u2netresult,original)
  cv2.imwrite('/content/gdrive/MyDrive/background_removal_DL/test_data/videos/output_frames/output'+str(i)+'.png',subimage)

  #subimage
  subimage=Image.open('/content/gdrive/MyDrive/background_removal_DL/test_data/videos/output_frames/output'+str(i)+'.png')
  #original
  original=Image.open('/content/gdrive/MyDrive/background_removal_DL/test_data/videos/input_frames/input'+str(i)+'.png')

  subimage=subimage.convert("RGBA")
  original=original.convert("RGBA")

  subdata=subimage.getdata()
  ogdata=original.getdata()

  newdata=[]
  for i in range(subdata.size[0]*subdata.size[1]):
    if subdata[i][0]==0 and subdata[i][1]==0 and subdata[i][2]==0:
      newdata.append((255,255,255,0))
    else:
      newdata.append(ogdata[i])
  subimage.putdata(newdata)
  subimage.save('/content/gdrive/MyDrive/background_removal_DL/test_data/videos/output_frames/output'+str(i)+'.png',"PNG")

  final_img=cv2.imread('/content/gdrive/MyDrive/background_removal_DL/test_data/videos/output_frames/output'+str(i)+'.png')
  ht,wd,l=final_img.shape
  sz=(wd,ht)
  img_array.append(final_img)
- Combining all the frames to create a video
#CHANGE OUTPUT FILE EXTENSION HERE - BY DEFAULT: .mp4
outv=cv2.VideoWriter('/content/gdrive/MyDrive/background_removal_DL/test_data/videos/output/output.mp4',cv2.VideoWriter_fourcc(*'MP4V'),fps,sz)

for i in img_array:
  outv.write(i)

outv.release()
NOTE:
The output video will be a .mp4 file. You can change the file extension in the above step if you want the output video in some other format.
.mp4 files do not have an alpha channel (alpha channel represents the degree of transparency), so the output video will have a white background by default.
- Deleting the temporary folders
%cd '/content/gdrive/MyDrive/background_removal_DL/test_data/videos'
!rm -R u2net_results
!rm -R input_frames
!rm -R output_frames
NOTE:
Background removal for videos might take some time depending upon the video's quality and the video's size.
The output video will be stored in the background_removal_DL/test_data/videos/output folder.
RESOURCES:
- Original U-2-Net Repository
- U-2-Net paper
- Github repository containing above codes
- Github repository containing required files for above code
- Google Drive Link to download u2net model
Thank you for reading!
I would love to connect with you on LinkedIn.
Contact me at nisargkapkar00@gmail.com.
Check out my other blogs on Hashnode:
Check out my articles on Medium:


